The Zipper’s History and How Its Design Works
Explore the zipper’s history, from early fastening ideas to the familiar zip, and learn how its slider and interlocking elements join fabric edges.
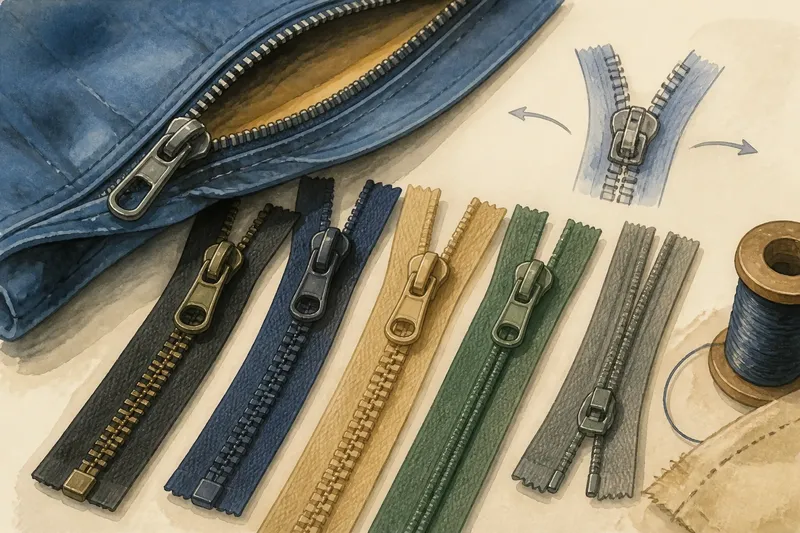
The zipper’s history begins with a practical irritation: closing shoes and clothing meant working through a row of separate fastenings. Early designers tried to replace that repeated effort with a mechanism that could join two edges in one movement. The familiar zip emerged through successive designs, not a single moment of invention.
What were early fasteners trying to improve?
Buttons, hooks and laces each had their place, but they required the wearer to make several connections one by one. A continuous fastener promised a quicker action: draw a moving part along two edges and close them together.
That simple aim concealed a difficult design problem. The mechanism had to keep two flexible strips aligned, hold them together under ordinary use and still move without snagging. Early attempts established the principle, but turning it into a dependable product took further refinement.
How did the zipper develop over time?
In the late nineteenth century, inventors proposed fastening devices that brought edges together through linked or clasp-like parts. One early approach was intended for shoes; later designs explored rows of elements that could engage as a slider travelled along them. These were important steps towards the modern zipper, though the designs and their practical success varied.
There was no lone inventor who produced the finished fastening in one stroke. Designers and manufacturers altered the elements, slider and supporting tape, making the mechanism more suitable for production and everyday use. The history is therefore best understood as a sequence of improvements to a shared idea.
“C-curity” is often mentioned as an early commercial name for a fastener associated with shoes. The familiar word “zipper” became attached to the device later, but accounts of the naming and its precise chronology vary. It is safer to treat the name’s origin as part of the fastening’s history rather than claim a single settled explanation.
As production developed, makers used different forms of interlocking elements, including metal teeth, moulded plastic pieces and coils. These options gave the fastening different appearances and degrees of flexibility. The underlying arrangement remained recognisable: two rows, a slider to guide them and tape to hold each row to the material.
How does the slider join two edges?
A zipper is a small system of parts. Two tapes attach to the edges of the garment or object. Along each tape sits a row of teeth or other interlocking elements, while the slider travels along the rows. A pull tab gives the user a grip.
- Tape: the fabric strip that anchors each row to the garment or object.
- Elements: the teeth, moulded pieces or coil that engage to form the fastening.
- Slider: the moving body that guides the elements together or apart.
- Pull tab: the handle used to move the slider.
- Stops: parts at the ends that limit the slider’s travel. A separating zipper also has a pin and box to help join its sides at the bottom.
The slider’s channel guides the two rows along different paths at one end, then brings them towards one another. As the slider moves, the elements meet in sequence. Moving it back guides them apart.
So a single pull does not create one uninterrupted bond. It brings many small elements into engagement, while the tape keeps their rows in position. The stops keep the slider on its intended track.
Which zipper types suit different openings?
A closed-end zipper keeps its sides joined at one end when open, as on many pouches. A separating zipper lets the two sides come completely apart, which suits a jacket that needs to open fully. Some zippers have two sliders, so the opening can be adjusted from either end or opened in the middle.
The elements differ, too. Metal teeth are visible and have a distinct feel. Moulded plastic teeth form separate shapes along the tape, while a coil zipper uses a continuous spiral form that can make a more flexible track. None is automatically best: the opening’s shape, the object’s construction and the desired appearance all matter.
Say a maker is sewing a soft pouch with a curved opening and has a pattern calling for a separating zip. The maker checks the pattern’s end arrangement first, then compares suitable separating options and chooses a flexible coil style if it fits the curve. The decision keeps the closure compatible with the pattern while favouring a track that can follow the soft shape; a closed-end zip would not meet the stated opening requirement.
What do people ask about zipper history and design?
Why is a zipper also called a zip?
“Zip” is the common shortened name for a zipper. The word is associated with the sound and swift action of the fastening, though the sound varies between designs.
Was the zipper invented by one person?
No single person created the finished everyday zipper in one step. Its design developed through contributions from inventors and manufacturers who refined the elements, slider and construction.
What does the slider actually do?
The slider guides the two rows of elements together or apart as it moves. Its shape controls their paths, while the tapes help keep the rows aligned.
Why do some zippers separate completely?
A separating zipper has a pin-and-box arrangement that lets its two sides come apart when the slider reaches the bottom. A closed-end zipper instead keeps the sides joined at one end.
How can you choose a replacement zipper?
Start with the opening, not just the visible teeth. Check whether the original zipper separates, how its ends are finished, whether the opening is straight or curved, and how the tape attaches to the surrounding fabric. A garment label or maker’s instructions may identify a compatible type.
- Observe the lower end: if it has a pin and box, choose a separating style; if the sides remain joined, look for a closed-end style.
- Observe the opening’s shape: if it curves through soft fabric, consider a flexible coil option; if the opening is straight and the design calls for visible teeth, compare other suitable constructions.
- Observe how the tape is attached: if it is sewn into a narrow seam, seek a replacement with a compatible tape arrangement; if the construction is unusual, check the maker’s instructions before choosing.
- Observe the slider count: if the original has two sliders and access from both directions matters, retain that arrangement; if it has one, a single-slider replacement may match the intended use.
- Observe the end stops: if the replacement must stop at a particular point, choose a design with suitable end components; if the original stops are integrated into the construction, ask a repair professional about compatibility.
- Observe the material and appearance: if matching visible metal teeth matters, compare metal options; if flexibility or a less prominent track matters more, consider coil or moulded alternatives.
Imagine a coat whose original zip comes apart at the bottom, has one slider and follows a straight front opening. The owner checks the pin-and-box arrangement, notes the single slider and looks for a separating replacement that suits the coat’s tape and appearance. If a candidate has a closed end, it fails the first requirement; if its construction matches, it remains a possible choice, with a tailor consulted if the attachment is unfamiliar.
The zipper’s history and its working parts belong together: successive designers refined a mechanism whose basic trick is still visible whenever the slider moves. Notice how the rows enter separately and leave joined, and the development becomes easier to understand. For a replacement, identifying the end arrangement is a useful first decision because it rules out designs that cannot serve the opening.